Beginner Pilates Routine at Home: A 20-Minute Flow You Can Zone Out To
This post may contain affiliate links, which means I may earn a small commission at no extra cost to you.
Sometimes you just don’t have time to pop on a video. And honestly? In my own practice, I learned I didn’t always want to follow a teacher. Some days I just wanted to do my own thing, like walking into the gym, putting my music on, and zoning out. So I put together a beginner Pilates routine you can zone out to: no screen, no countdown, just you, your mat, and your breath.
I’ve practiced Pilates for years and I’m newer to teaching, so this is the simple flow I actually come back to at home. It takes about 20 minutes (transitions take a little extra time while you’re still learning the form), it uses classic beginner mat moves, and once you’ve done it a few times you won’t need to look at your phone at all. All you really need is a mat, but if you’re curious, I keep the mat and weights I actually use in one spot, plus my favorite Pilates outfits.
If you’re brand new, start with my guide to beginner Pilates at home: what to do first and what to skip.
[Amber: add link to your Pilates post here]
A Quick, Friendly Safety Note
If you’re pregnant, postpartum, recovering from an injury, or managing back or pelvic floor issues, check with your doctor before starting. And always: if anything hurts (sharp, pinchy, or just wrong), stop. Pilates should feel challenging, never painful.
How This Beginner Pilates Routine Works
You’ll do a short warm-up, nine classic mat moves, and a cool-down. Move slowly, breathe in through your nose and out through your mouth, and focus on control over speed. For every move you’ll find short steps, a few form cues, an easier modification, and an optional progression for when it starts to feel easy.
Total time: about 20 minutes, including transitions while you learn the form. You’ll need: a mat or a soft rug. That’s it.
Warm-Up (2 to 3 Minutes)
Breathing and Imprinting (5 breaths)
- Lie on your back, knees bent, feet flat and hip-width apart.
- Inhale wide into your ribs. Exhale and gently draw your belly button toward your spine.
- On the exhale, softly press your low back toward the mat (that’s imprinting), then release back to neutral on the inhale.
Form cues: Keep your shoulders heavy and your jaw relaxed. Think “ribs knitting together” as you exhale. The movement is small; it’s not a big tuck.
Cat-Cow (6 rounds)
- Come to hands and knees, wrists under shoulders and knees under hips.
- Inhale, drop your belly and lift your chest (cow). Exhale, round your spine toward the ceiling (cat).
Form cues: Move one vertebra at a time. Press the floor away so your shoulders don’t sink. Let your head follow your spine.
Modification: Do it seated in a chair with hands on your knees. Progression: Add a slow side-to-side tail wag between rounds.
The Routine: 9 Classic Beginner Mat Moves
1. Pelvic Curl / Bridge (8 reps)
- Lie on your back, knees bent, arms long by your sides.
- Exhale, imprint your low back, then peel your spine up one bone at a time until you’re in a bridge.
- Inhale at the top. Exhale and roll down slowly, top of the spine first.
Form cues: Keep weight even in both feet. Don’t push your ribs up past your hips. Keep your neck long and relaxed.
Modification: Lift only halfway, just your tailbone and low back. Progression: Hold the top and march, lifting one foot at a time.
2. The Hundred, Beginner Variation (5 to 10 breath cycles)
This is not the full 100. As a beginner, you’ll do 5 to 10 breath cycles with your knees bent.
- Lie on your back with knees bent, either feet flat on the mat or legs lifted in tabletop (knees over hips, shins parallel to the floor).
- Exhale and curl your head and shoulders up, arms reaching long by your hips. If your neck tenses, rest your head on the mat. That’s a perfectly good default.
- Pump your arms small and steady. Breathe: inhale through your nose for 5 pumps, then exhale through your mouth for 5 pumps. That’s one breath cycle. Do 5 to 10 cycles.
Form cues: Look at your belly, not the ceiling. Keep the low back imprinted and the pumps small, from the shoulders.
Modification: Keep your head down and feet on the mat the whole time. Progression: Once 10 cycles feel steady with your head lifted, slowly extend your legs to a high diagonal.
3. Single Leg Stretch (8 reps per side)
- Curl up into a chest lift with both knees in tabletop.
- Extend one leg out at a diagonal while you hold the other knee. Switch legs with control.
- Breathe: inhale as you switch legs for two counts, exhale for two counts. Keep the rhythm slow and even.
Form cues: Keep your torso still while your legs move. Reach the straight leg long instead of dropping it low. Keep the elbows wide.
Modification: Keep your head down on the mat and move slowly, especially if you feel any neck tension. Extend the leg higher toward the ceiling to make it easier. Progression: Lower the extended leg a little more, keeping your back imprinted.
4. Single Leg Circles (5 each direction, per leg)
- Lie on your back, one leg reaching to the ceiling, the other bent with the foot on the mat.
- Draw small circles with the lifted leg: across your body, down, around, and up.
Form cues: Keep your hips still and heavy, like they’re glued to the mat. Smaller circles are better than wobbly big ones. Press your arms into the floor for support.
Modification: Bend the lifted knee slightly. Progression: Extend the bottom leg long on the mat.
5. Standing Roll Down (5 reps)
This is a controlled, partial roll down from standing, not a full roll-up from the floor.
- Stand tall with feet hip-width apart and knees soft.
- Exhale and nod your chin, then slowly roll down one vertebra at a time, letting your arms hang. Only go as far as feels controlled, even just to your thighs or knees.
- Inhale at the bottom. Exhale and roll back up slowly, stacking your spine until you’re standing tall.
Form cues: Scoop your belly as you roll down. Keep your knees soft and your weight over the middle of your feet. Let your head and neck stay relaxed.
Modification: Roll down only partway, with hands sliding down your thighs for support. Progression: Roll a little lower each rep, staying slow and controlled.
6. Spine Stretch Forward (5 reps)
- Sit tall with legs extended a bit wider than your hips, feet flexed (bend your knees if your hamstrings are tight).
- Exhale and round forward from the top of your head, reaching your arms toward your feet. Inhale and stack back up.
Form cues: Lift up before you curl over. Keep your sit bones grounded. Think “over a beach ball,” not collapsing down.
Modification: Sit on a folded towel or cushion. Progression: Hold the stretch for an extra breath, reaching longer.
7. Side-Lying Leg Series (10 leg lifts + 5 small circles, per side)
- Lie on your side, head resting on your arm, legs slightly forward of your hips.
- Leg lifts (10): lift your top leg to hip height and lower with control.
- Small circles (5 each direction): make small circles with the top leg.
- Switch sides and repeat.
Form cues: Stack your hips, and don’t let the top hip roll back. Keep your waist lifted off the mat. Lengthen the leg out of the hip, not just up.
Modification: Bend your bottom knee for more stability. Progression: Prop up on your forearm and keep your core steady.
8. Swan Prep (6 reps)
- Lie on your stomach, hands under your shoulders, elbows hugging in.
- Inhale to prepare. Exhale and lift your chest just a few inches, looking slightly forward. Inhale at the top. Exhale and lower slowly.
Form cues: Lift from your upper back, not your low back. Keep your belly gently lifted and your legs heavy. Slide your shoulders down your back.
Modification: For a gentler beginner version, rest on your forearms with elbows under your shoulders (sphinx) and lift only your head and chest a tiny bit, or simply hold and breathe. Keep the lift small if your low back feels pinchy. Progression: Lift your hands a hair off the mat at the top.
9. Cat-Cow to Child’s Pose (4 rounds)
- From hands and knees, do one slow cat and one slow cow.
- Sit your hips back to your heels into child’s pose for a breath, then come forward again.
Form cues: Breathe slowly and match each move to a breath. Keep your elbows soft. Let your neck relax completely in child’s pose.
Modification: Put a pillow between your hips and heels. Progression: Add a thread-the-needle twist on each side.
Cool-Down (2 Minutes)
- Knees-to-chest rock (30 seconds): hug your knees and gently rock side to side.
- Supine twist (30 seconds per side): drop both knees to one side and look the other way.
- Final breaths (5 breaths): lie flat and let everything go heavy.
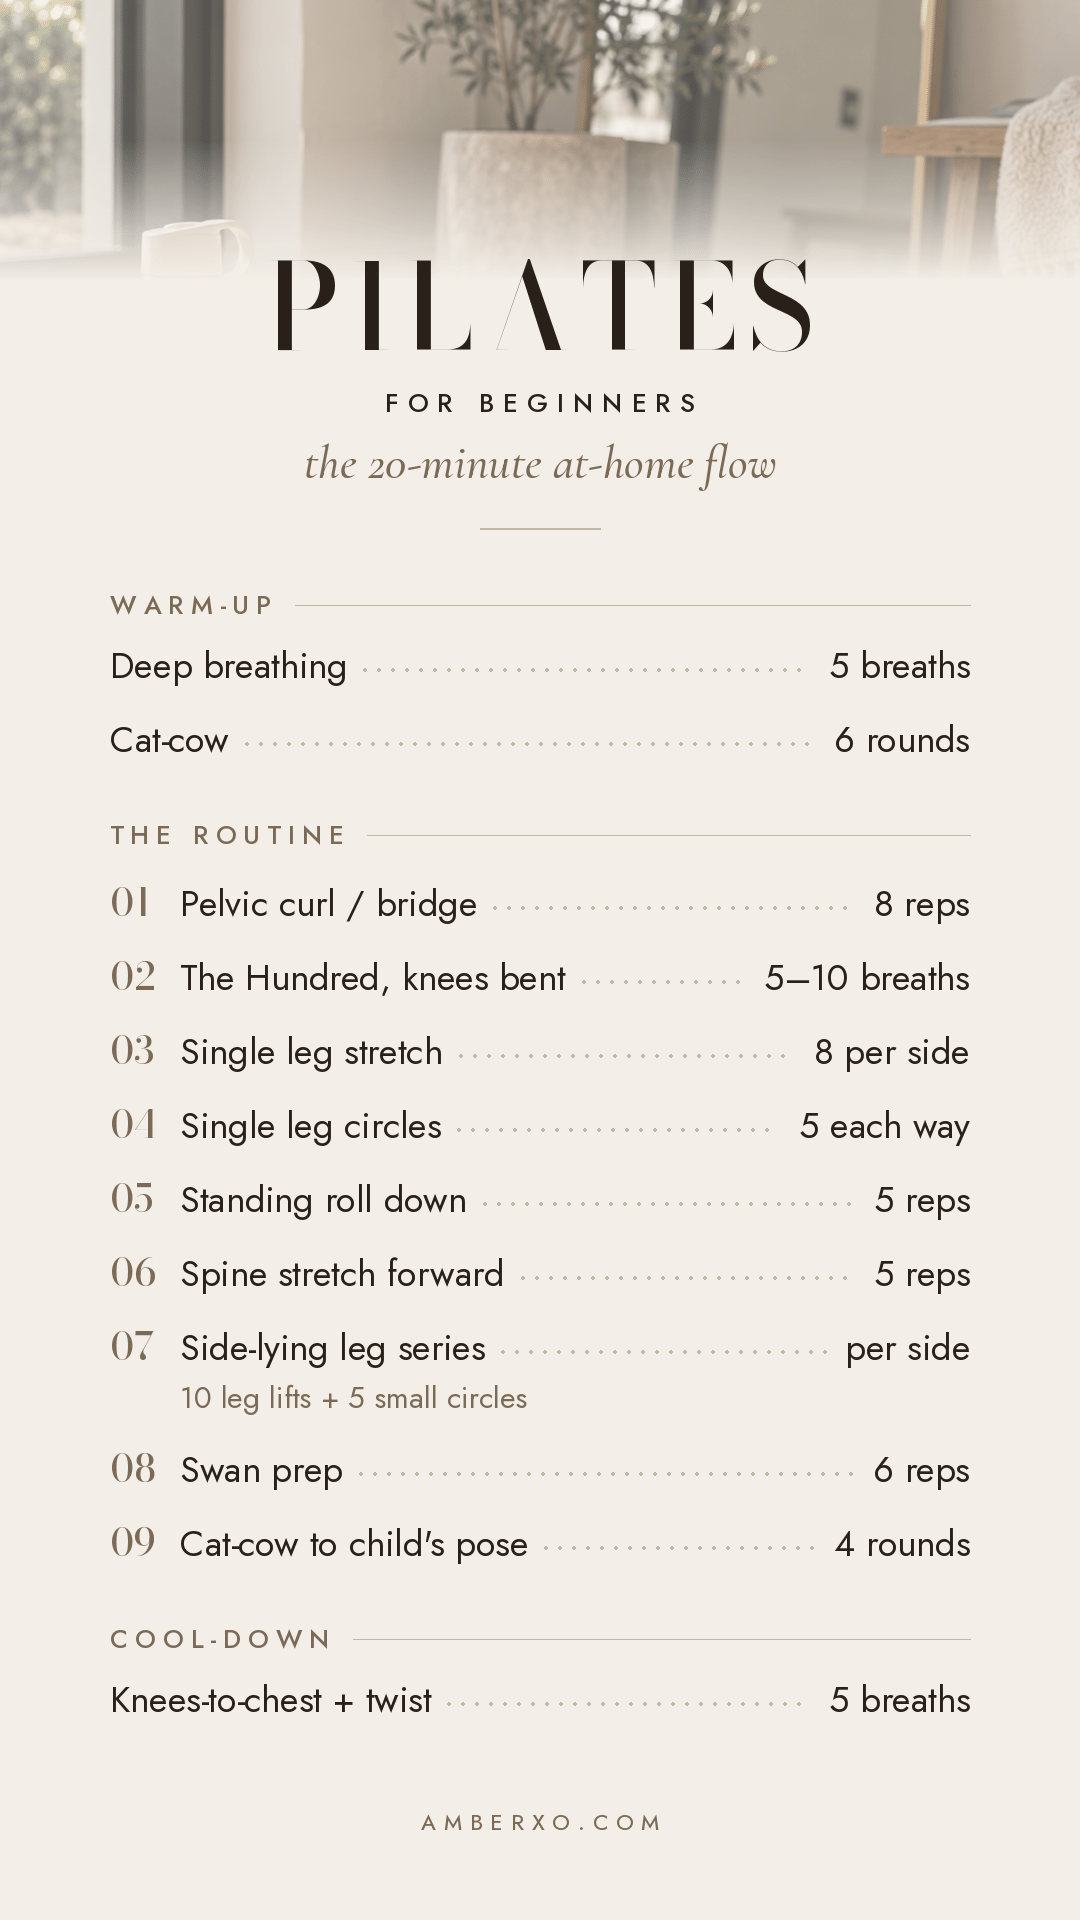
Your Beginner Pilates Routine Quick List (Screenshot This)
- Deep breathing: 5 breaths
- Cat-cow: 6 rounds
- Pelvic curl / bridge: 8 reps
- The Hundred (beginner, knees bent): 5 to 10 breath cycles
- Single leg stretch: 8 per side
- Single leg circles: 5 each way, per leg
- Standing roll down (partial): 5 reps
- Spine stretch forward: 5 reps
- Side-lying leg series: 10 leg lifts + 5 small circles, per side
- Swan prep: 6 reps
- Cat-cow to child’s pose: 4 rounds
- Cool-down: knees-to-chest, twist, 5 breaths
Shop My Pilates Favorites
These are the mat, light weights, and workout sets I actually use at home. Nothing fancy, just the pieces I reach for every time I roll out my mat.
Tips to Make It Your Own
- Put your music on. This is the whole point! Pick a playlist you love and let it set the mood. Slower songs keep you controlled.
- Find your pace. There’s no timer here. If a move feels great, stay a little longer. If you need a break, take it.
- Aim for 3 times a week. Consistency beats intensity. Three short sessions a week is where you’ll start to feel stronger and more connected to your core.
- Swap moves as you grow. Once the progressions feel easy, try them, or repeat your favorite move at the end.
- Fuel yourself well. As a certified nutrition coach, I always say movement feels better when you’ve eaten a little protein and stayed hydrated.
Pilates doesn’t have to be a production. Roll out your mat, press play on your music, and give yourself about 20 minutes. Your body will thank you.